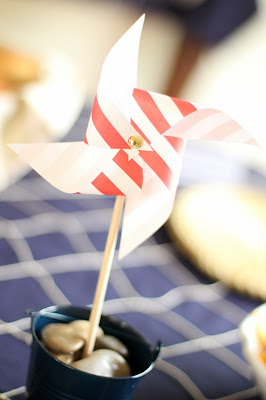
These simple pinwheels are the perfect addition for a baby shower, bridal shower, or outdoor event. Since they're budget friendly too, I made tons of them for my son's nautical birthday party. Take these directions a step further and make the pinwheels into centerpieces and garland by simply attaching them to ribbon or wooden dowels. To make your pinwheel functional, use a grommet instead of brad.
Materials:
Card stock (double sided is preferable but not necessary as you can see from the pictures below)
Scissors
Brad or paper fastener (I used the plain old bronze ones but you can purchase colored brads or even attach jewels and other decorations to the front of the brad using hot glue)
Optional: hole punchOptional: ribbon, lollipop sticks, or wooden dowels (Don't have any on hand? Use chopsticks instead.)
Step 1:
Cut out a square from your card stock. It's up to you how large or small you'd like your pinwheel to be, just make sure your square is even on all four sides.
Step 2:
Fold your square into a triangle by bringing the corner on the top right to meet the corner on the bottom left. Unfold it and fold it again diagonally using the other two corners. Unfold. Your fold lines in the center of the square should make an "x.
Step 3:Using your scissors, cut your square along the creases. Start from one corner and work your way towards the center along the fold line. Stop about 1/4 - 1/2 inch from the center. Repeat for the remaining three corners. This will create four triangles.
Step 4:
Starting with the top right triangle, bring the bottom right point to the center of the square without making a crease. Repeat with the other three points. Hold the points in place with your thumb. Fasten with a brad/paper fastener, making sure the brad goes through each point and the center.
To make this step easier: use a basic hole puncher to punch a hole in the middle of the square and in the bottom right corner of each triangle. Follow the steps above so that each hole punch overlaps the other and fasten with a brad.
Sometimes it's difficult to get the paper to stay in place so I connect the brad as I go (adding on one triangle point at a time then connecting it to the center).
Step 5:
Close the brad ends by bending them outward to secure the pinwheel.
Pinwheel garland: Follow the directions above to make several pinwheels. Close the brads around twine or ribbon at equally spaced intervals. Use hot glue or double-sided tape to help secure the pinwheel if needed.
Pinwheel Centerpiece: Close the brad around a wooden dowel and place dowel into a vase/container.


No comments:
Post a Comment
Note: Only a member of this blog may post a comment.